Centerlines from silhouettes
The original letter contours remain visible in the preview. Compare the generated paths with the artwork and review branches, closed loops and path ends.


Turn a lettering or logo silhouette into LED neon centerlines in Orange Cut. Review paths over the original contours, edit nodes and curves, and use the result to prepare an illuminated sign or a 3D printed neon frame.
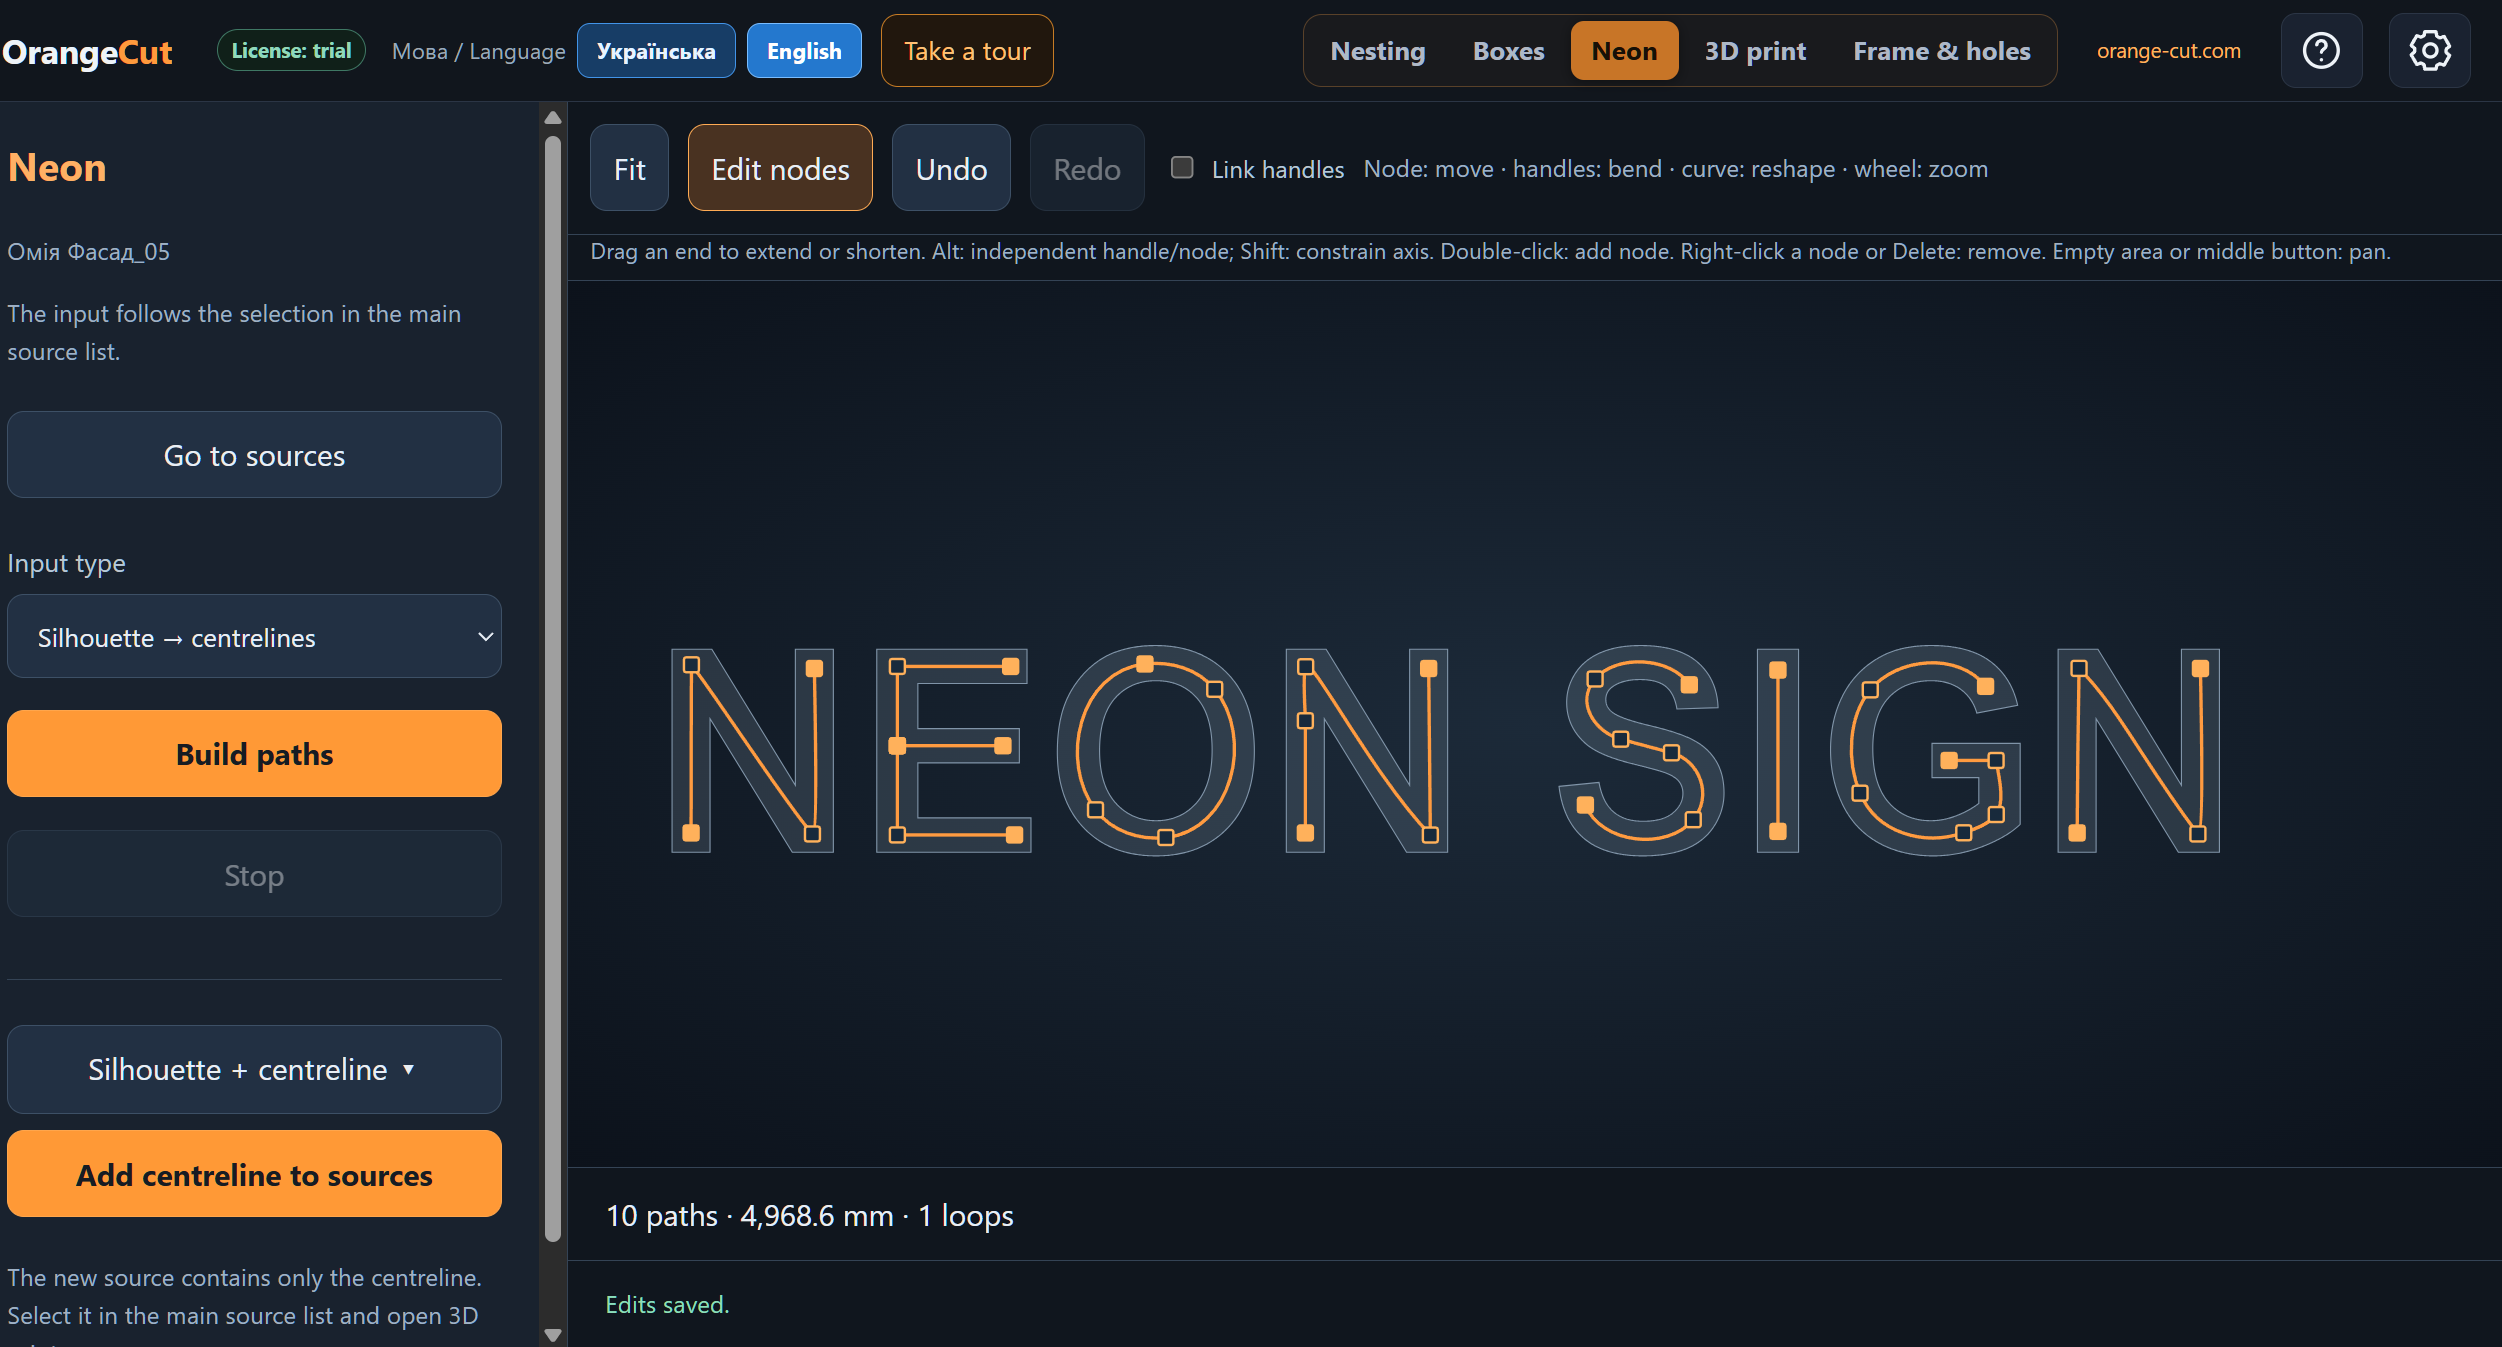
Orange paths are shown over the letter silhouettes. Edit nodes and handles to refine the centerlines; the report below shows the path count, total length and closed loop count.
Import vector letters or a logo from CorelDRAW or SVG / DXF and select the source.
Open Neon, choose Silhouette → centerlines and build the paths.
Move nodes, adjust curves with handles, add or remove points, and extend or shorten path ends.
Save the centerlines as a separate source. Select it and open 3D print to create a frame for the neon.
The original letter contours remain visible in the preview. Compare the generated paths with the artwork and review branches, closed loops and path ends.
Adjust paths directly in the workspace: move nodes and handles, reshape curves, and undo or redo changes.
Use the centerlines to build a channel for LED neon. The separate STL page covers profile dimensions, the 3D preview and model export.
Orange Cut builds paths from the silhouette. Review the result and adjust it with the node editor where needed.
Yes. Move nodes and handles, add or remove points, and extend or shorten path ends.
Add the centerlines to sources, select the new source in the main list and open the 3D print tab.