A profile and channel for your neon
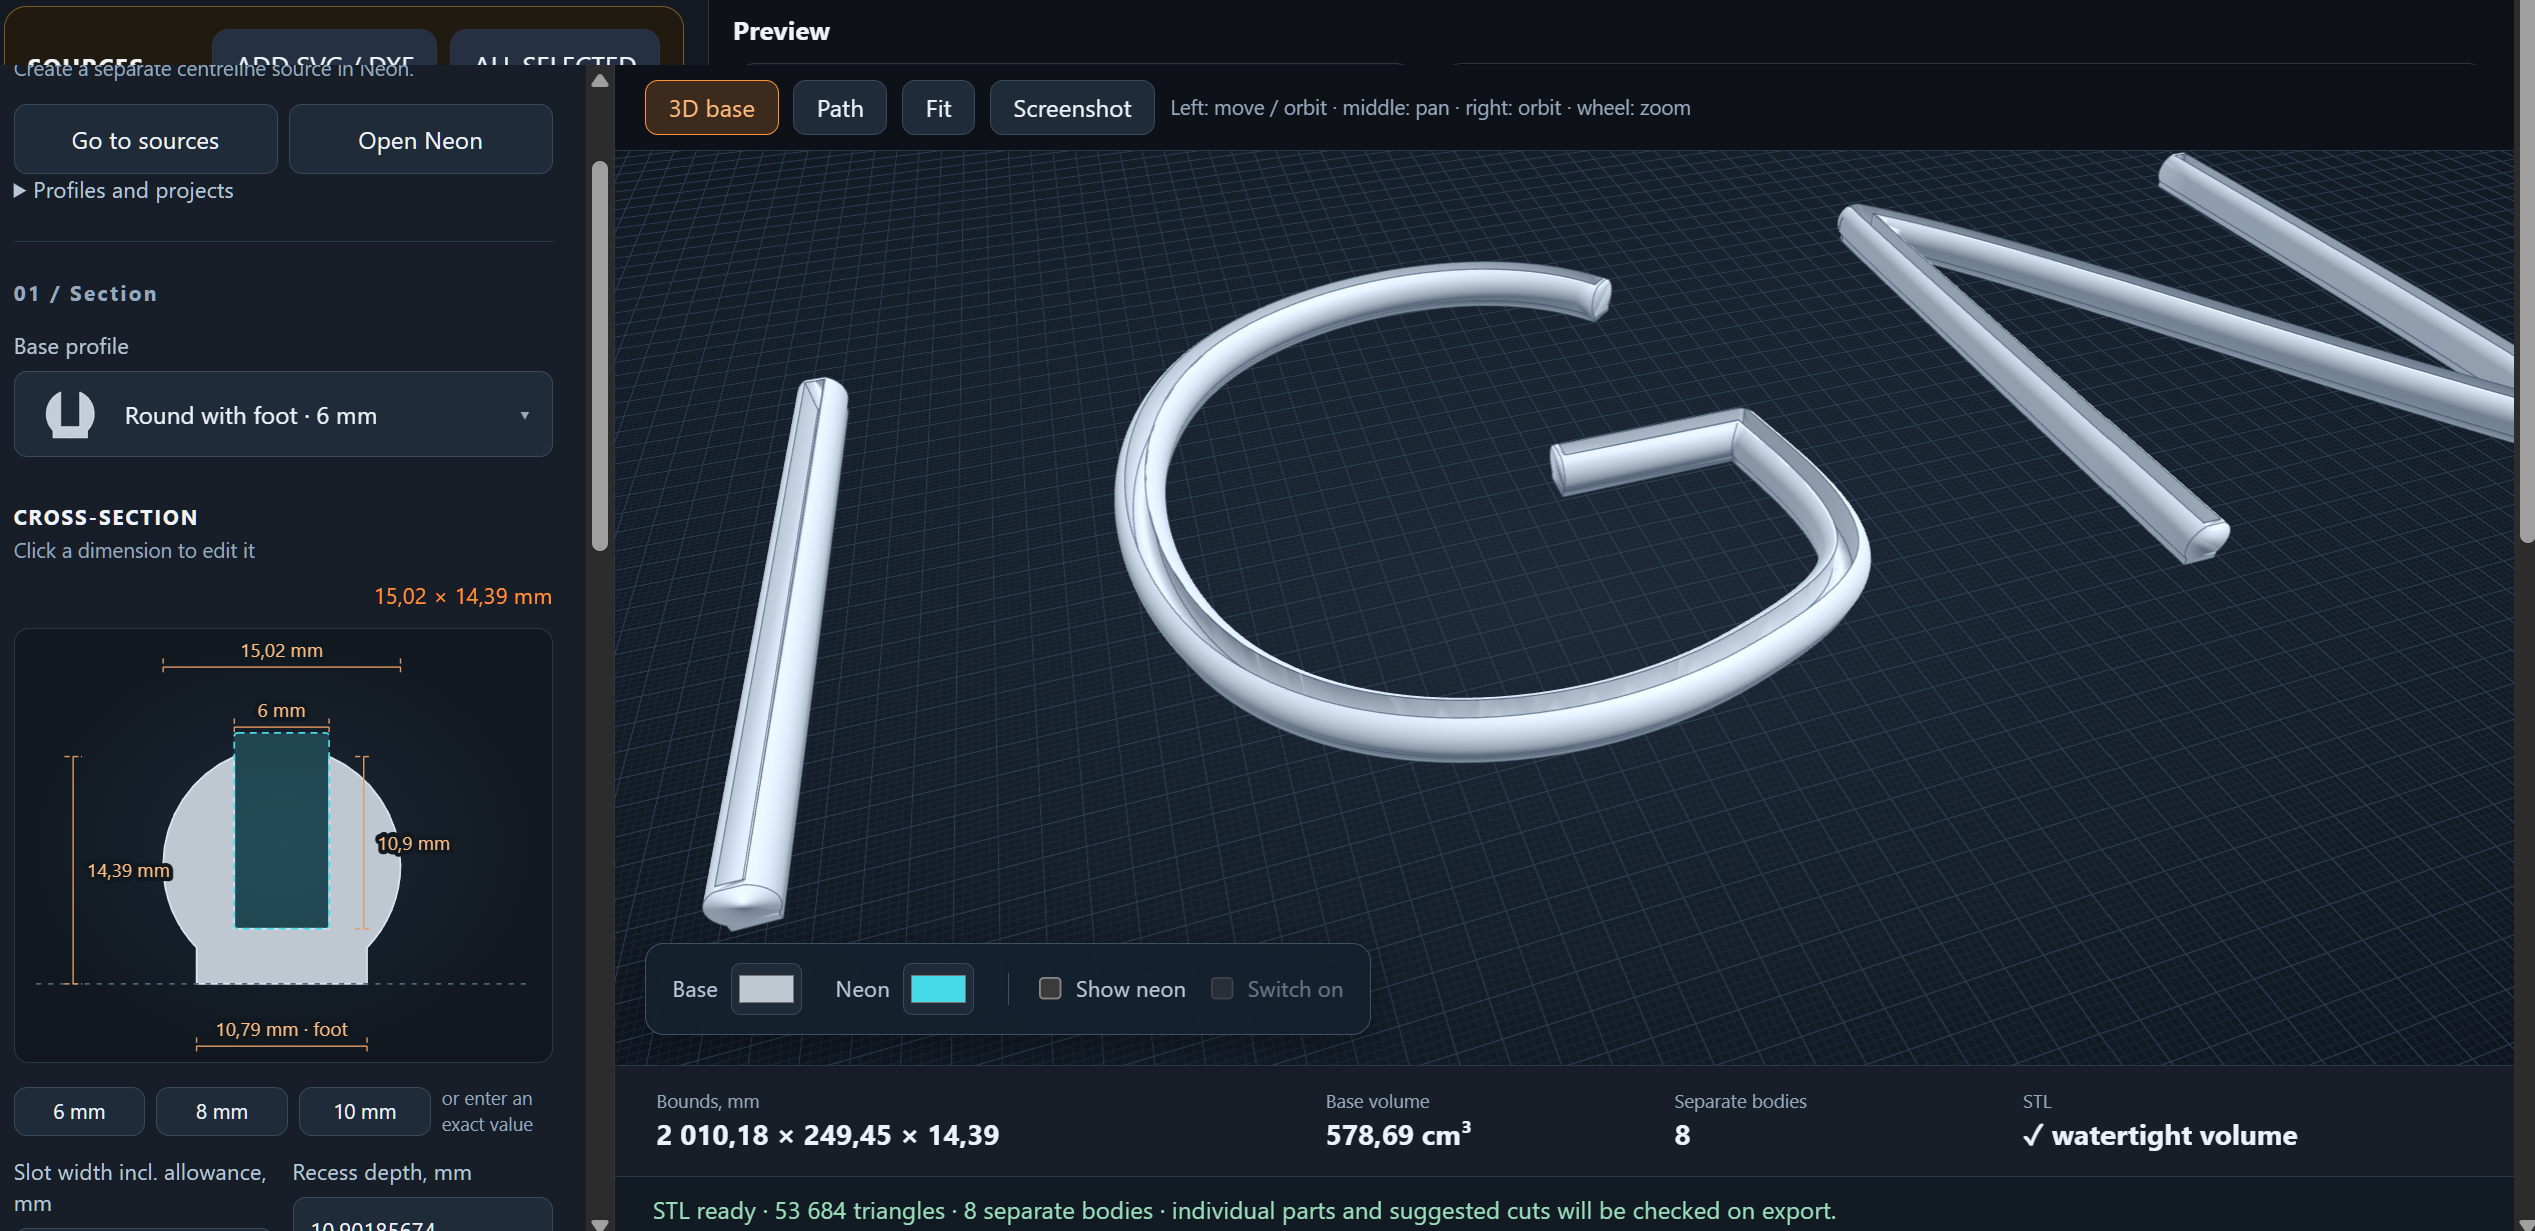
Set the slot width with an allowance for your LED neon. Edit cross-section dimensions on the drawing; quick sizes include 6, 8 and 10 mm, with exact values available as well.


Build a solid base with an LED neon channel along the centerlines of your lettering. Set the frame cross-section, review the 3D model and export STL geometry for print preparation in your slicer.
An example of a round profile with a foot and a 6 mm slot. The dimensioned cross-section is shown on the left and the solid lettering frame on the right. The report includes bounds, base volume, separate bodies and the STL watertight volume check.
Create centerlines in Neon, add them to sources and open 3D print.
Choose the base profile and configure slot width, recess depth, bottom thickness and wall thickness.
Inspect the frame from different angles and check bounds, base volume, separate body count and STL status.
Save a whole STL or prepare cuts to fit your printer bed. Export cut parts as one STL or separate files in a ZIP archive.
Set the slot width with an allowance for your LED neon. Edit cross-section dimensions on the drawing; quick sizes include 6, 8 and 10 mm, with exact values available as well.
Orbit, zoom and pan the model. Review the base and channel, overall dimensions and calculated volume before export.
Enter your printer bed dimensions and review the suggested cuts. Export the whole model, cut parts in one STL, or a ZIP with separate STL files and an assembly diagram.
The base profile follows the centerlines of the selected source. Generate and edit centerlines from silhouettes in the Neon tab.
Yes. Slot width and cross-section dimensions are editable. Print a small sample to check the fit of your neon before printing a full batch.
During export, prepare cuts using the printer bed dimensions, review split lines and save the parts as separate STL files.
Yes. Orange Cut creates STL geometry. Set part orientation, material, layers, infill and the printer job in your slicer.